Spring Boot has been gaining traction in the Java community for a few years now, but instead of reinventing the wheel, it has integrated a bunch of good, off-the-shelf packages and designed some simple programming frameworks with IoC and AOP to greatly simplify the complexity of development and reduce the number of tedious setup steps. Instead of using Spring Initializr to get you started, I’m going to completely hand-carve the Spring Boot application and dissect the entire development and startup process from scratch.

Create a Spring Boot application
The following steps should be performed in an empty folder.
Create a pom.xml file required for Apache Maven
|
|
Running mvn package directly will automatically generate a target/app1-0.0.1-SNAPSHOT.jar file, but this file is very small, only 1.4KB, and there is nothing substantial at the moment, so this jar file is useless.
Understanding the Parent POM file provided by Spring Boot
You can see the following <parent> fragment from the pom.xml file just now, which explicitly specifies a Parent POM file named spring-boot-starter-parent.
Because the Spring Boot framework helps you organize many Starters packages, you can greatly simplify the threshold for developing different kinds of applications. This spring-boot-starter-parent POM file defines the default values for all Starters packages. Since you won’t necessarily use these packages, but when you do, you don’t have to spend time understanding the settings because Spring Boot has it all figured out for you. He writes all the properties, package versions, and common Plugins that most people set in this Parent POM file, and automatically inherits them to your Spring Boot project.
You can find spring-boot-starter-parent this POM file from the following path, it is recommended that you open it to see the contents.
|
|
Note: The
groupIdof all Starters packages isorg.springframework.boot
Add dependencies to the classpath
Since Spring Boot is a Java application, the JARs that the application needs to refer to can be managed entirely through Maven or Gradle. Let me take Maven as an example. Our spring-boot-starter-parent POM file, through the Dependency Management mechanism, helps you define the dependencies you will use in advance, and also helps you specify the version information. So you don’t need to specify <version> in your pom.xml, you can load the dependencies directly with groupId and <artifactId>.
Of course, this is just an inheritance from Maven, so if you want to decide which version you want to use, you can still add the
<version>element to specify the version. But you’d better think about why you’d want to do this. Because if you want to upgrade Spring Boot in the future, just adjust thespring-boot-starter-parentparent POM version, and all the “tested” dependent packages will be upgraded to the problem-free version, and specifying your own package version is a risky upgrade.
We can use mvn dependency:tree to see the dependency information of a project.
|
|
At this point you will only see a com.dootify:app1:jar:0.0.1-SNAPSHOT package (which is the current project) because we do not declare any dependent packages in pom.xml.
|
|
If you want to use Spring for web development (including MVC or API development), just add spring-boot-starter-web starters to pom.xml.
Please remember not to add the
<version>element, it is best practices to inherit the version defined by the Parent POM directly.
The contents of the pom.xml file after the addition are as follows.
|
|
Let’s run mvn dependency:tree again to see the project’s package dependencies, and we’ll have a lot of information.
|
|
Writing your first Java application
Create the src/main/java/com/duotify/app1/MyApplication.java file.
|
|
The @RestController annotations on the class are also known as Stereotype Annotations in Spring. Its main purpose is to improve the readability of the code, so that when developers see the @RestController annotation, they will know at a glance that this class is actually a controller that supports REST functionality. Since this design will automatically form a stereotype, developers will automatically recognize the role and purpose of this category when they see this kind of annotation, which is the main reason why I think he used the word Stereotype.
In addition, Stereotype Annotations have another purpose, which is to give a role to “classes”, so that Spring Framework can quickly find the corresponding services through Component scanning.
Spring’s built-in Stereotype Annotations can be found in org.springframework.stereotype (Spring Framework 5.3.23 API) , basically all Stereotype Annotations inherit from org.springframework.stereotype.Component (@Component) type.
The @EnableAutoConfiguration annotation on the class allows Spring Boot to automatically find all the classes of JAR files in the dependent packages and automatically create and register them as Spring Beans components so that Spring Boot can use these reusable Spring Beans components, such as Tomcat or Spring MVC, when needed.
The @RequestMapping("/") on the home() method defines the route of the controller and determines the structure of the URL.
Launching a Spring Boot application
|
|

Open your browser and visit http://localhost:8080/ to see the website!

Package the application as a *.jar file
If you run mvn package and try to package the target/app1-0.0.1-SNAPSHOT.jar file, it is still very small, only 2.4KB, and does not contain other packages, such as Tomcat, so it cannot be a standalone executable yet.
In fact, Java does not provide a packaging method called Nested JAR, which means that a JAR file contains other JAR files that need to be used. So if you want to deploy an application with dependent packages, you need to deploy several files, which is inconvenient to use. If we want to release a self-contained executable jar file that contains all JAR files, we usually package the application in a format commonly known as
ÜBER JARorFAT JAR. See The Executable Jar Format file for details.
For this application packaging requirement, there is a spring-boot-maven-plugin plugin that can help us to achieve our goal, you just need to add the following settings to the project’s pom.xml.
The contents of the pom.xml file after the addition are as follows.
|
|
Theoretically the spring-boot-maven-plugin plugin doesn’t have so few settings, because you still have <executions> and <configuration> to set. But the Parent POM provided by Spring Boot already does that for you, which is why it looks so easy!
The complete configuration of this spring-boot-maven-plugin plugin is as follows (taken from the POM of spring-boot-starter-parent).
|
|
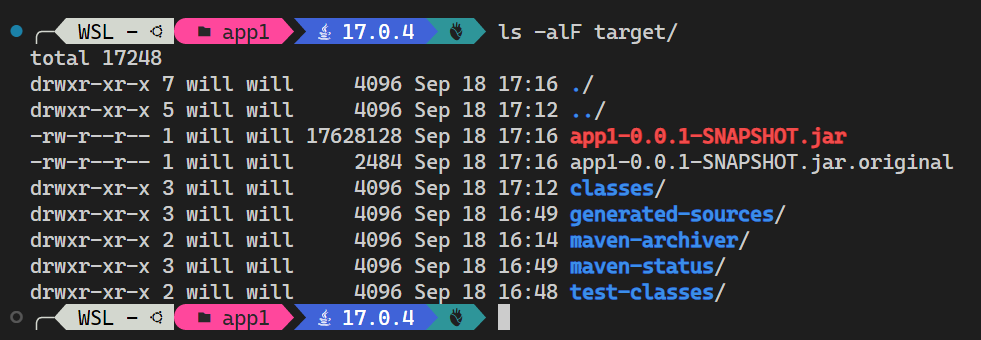
Run the mvn package to package the target/app1-0.0.1-SNAPSHOT.jar file, which is 16.8MB in size, contains the Tomcat package, and can be run independently.

The above
app1-0.0.1-SNAPSHOT.jar.originalis the original JAR file of your application. tomcat and other dependencies are added when spring-boot-maven-plugin executes therepackage(Goal).
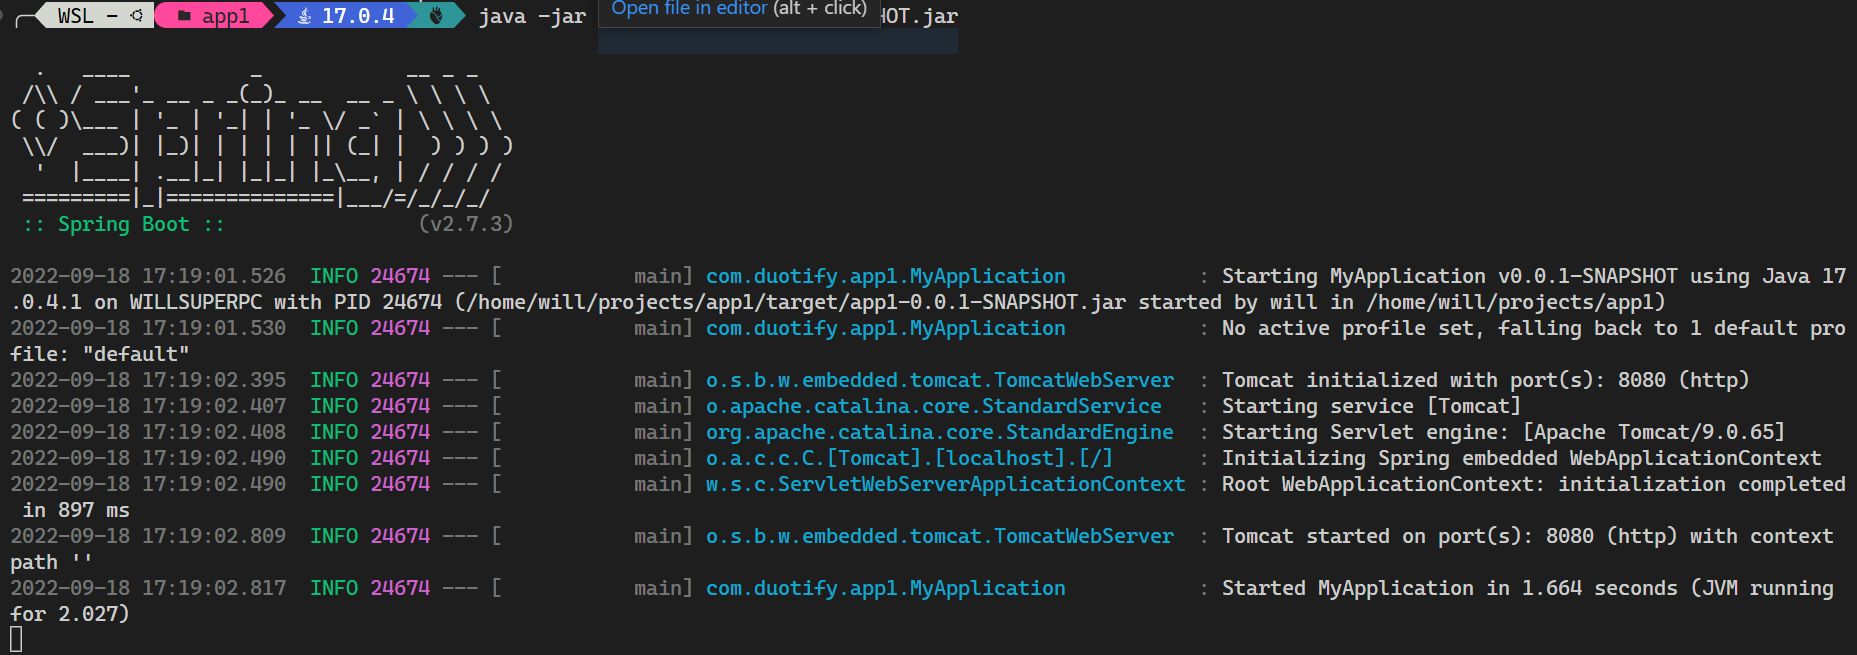
Finally, run java -jar target/app1-0.0.1-SNAPSHOT.jar and you will find your Spring Boot application running and starting smoothly! 👍

Conclusion
Spring Boot provides a simple architecture that allows you to complete tasks quickly, but behind the magic of the architecture, there is actually a lot to explore. When you have clarified the principles behind it, you will be able to learn from it and help you think about it to make the right technical decisions at the right time.
Related links
- Spring Boot Reference Documentation
- java - What is an uber jar? - Stack Overflow
- Spring Annotation Programming Model
Reference https://blog.miniasp.com/post/2022/09/19/Spring-Boot-Quick-Start-From-Scratch